Chicken Curry

The Ultimate Bangladeshi-Style Chicken Curry Recipe: A Step-by-Step Guide with Pro Tips
Bangladeshi-style chicken curry is arguably one of the most beloved and widely searched recipes across the globe. Its appeal lies in its bold flavors, aromatic spices, and the comforting richness of the gravy. However, despite thousands of chicken curry recipes available online, many home cooks still find themselves disappointed with the final dish—not quite achieving the depth of flavor, consistency, or texture they had envisioned.
If you’ve ever ended up with curry that's too watery, overly spicy, or lacking that authentic restaurant-quality finish, this guide is for you. In this comprehensive recipe breakdown, we’ll explore essential tips, cooking techniques, and secret touches that elevate a regular chicken curry into a flavorful, mouthwatering Indian-style masterpiece. Follow these carefully curated steps, and you'll be making perfect chicken curry every single time.
Introduction: The Heart of Bangladeshi Cooking
Today, we’re diving deep into the fundamentals of Bangladeshi cooking through the lens of one of its most iconic dishes: chicken curry. This isn't just a quick throw-it-together dish; it's a celebration of spices, textures, and time-honored techniques. Let’s start by building a strong foundation with the ingredients and essential preparation steps.
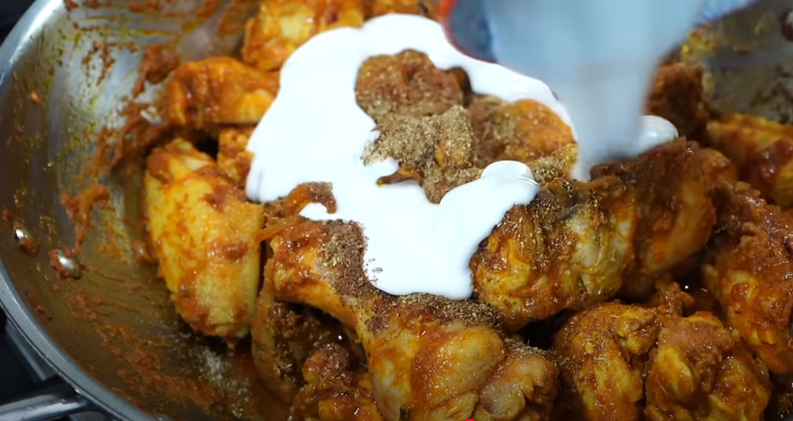
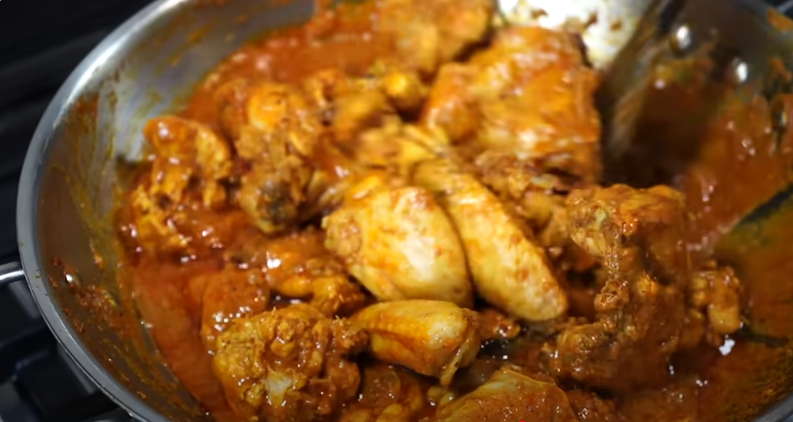
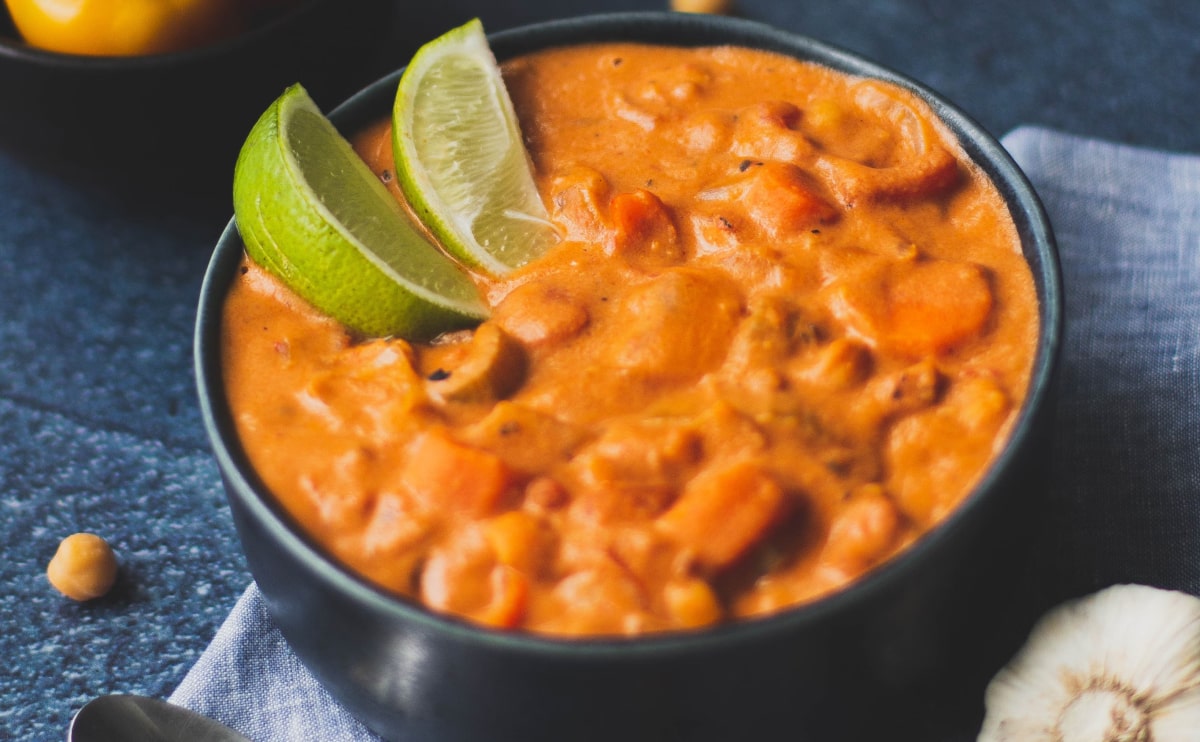
Final Touch: Silky Gravy Check
Look at the consistency of the gravy. It should be smooth, thick, and glossy. No chunky onions floating around. No separation of oil from liquid. This is the hallmark of a perfectly cooked Bangladeshi-style chicken curry.
Taste and adjust salt or spice, if needed. If the gravy feels too spicy, a splash of cream or a bit more yogurt can mellow it out.
Serving Suggestions
Serve this curry hot with:
- Steamed basmati rice
- Jeera rice (cumin rice)
- Naan or roti
- Even plain pasta in a fusion twist
Garnish with fresh coriander leaves if desired.
Ingredients
For 4 Serves
Vegetable Oil |
1 tbsp |
Onion |
1 |
Garlic Cloves |
2 |
Fresh Ginger Root |
30 g |
Curry Powder |
1 tbsp |
Allspice |
1 pinch |
Thyme Sprigs |
2 |
Scotch Bonnet Chillies |
1 |
Tomatoes |
400 g |
Coconut Milk (canned) |
400 mL |
Bananas |
2 |
King Prawns |
400 g |
Lime |
1/2 |
Available in our store
Step 1: The Base – Ginger-Garlic-Tomato Paste
One of the most critical elements in any Indian curry is the base paste. While many people opt for pre-made ginger-garlic paste, I strongly discourage it. Fresh is always better when it comes to flavor and aroma.
Start by preparing a homemade paste. For this, you’ll need:
- A thumb-sized piece of fresh ginger
- 8–10 garlic cloves
- 2 green chilies (optional if you want heat)
- A quarter of a large onion
- One large ripe tomato
Blend all of these together into a smooth paste. If you're sensitive to heat, feel free to leave out the green chilies—the paste will still be flavorful. The goal is a silky smooth texture. Remember: smooth paste = smooth gravy.
Pro Tip: Always blend your paste well. Chunky paste leads to a coarse gravy, and that’s something we want to avoid.


Step 2: Yogurt – Creamy Element with a Trick
Plain, unflavored yogurt adds creaminess and a subtle tang that enhances the flavor of chicken curry. However, yogurt must be handled carefully. Remove it from the fridge ahead of time so it can reach room temperature. Beat it thoroughly with a spoon or whisk until it’s smooth.
Why? Because cold, unblended yogurt will curdle upon hitting a hot pan—ruining the texture of your curry.
Dairy-Free Tip: If you’re allergic to dairy or avoiding it, skip the yogurt and add an extra tomato in the paste blend. The result is still rich and flavorful!
Step 3: The Oil – Quantity and Choice Matter
Place your cooking pot or deep pan on high heat. I personally love using mustard oil for its pungent aroma and authentic flavor, but feel free to use any neutral oil like sunflower or canola.
Many people worry about the amount of oil used in Indian cooking. Let me clarify: for a good-looking, glossy curry, a certain amount of oil is necessary to properly fry the spices and onions and release their flavors. It’s not excessive—it's essential.


Step 4: Tempering the Whole Spices
Once the oil is hot, reduce the heat to low. Now add your whole spices:
- 1 dried bay leaf
- 3–4 green cardamoms (crack them slightly to prevent bursting)
- 1 small cinnamon stick
- 3–4 cloves
These spices infuse the oil with their deep, warm aromas, laying the foundation for a robust curry.
Note: Always reduce the heat before adding whole spices to avoid burning them.
Step 5: Browning the Onions – A Game-Changer
Next, add thinly sliced onions. Sprinkle a pinch of salt to help them soften faster. Sauté on medium-high heat, stirring frequently.
As the onions start to brown at the edges, reduce the heat to medium-low. You’re aiming for a soft golden-brown color, not a deep brown unless the recipe specifically calls for it. Overbrowning can lead to a dark, bitter gravy.
Trick: If the onions start to get too brown, add a splash of water to slow down the cooking process. This trick maintains the right color and texture.


Step 6: The Spice Base – Introducing Color and Flavor
Once the onions are golden and soft, add:
- 1/2 teaspoon turmeric powder
- 1 teaspoon Kashmiri red chili powder (or regular red chili powder)
Kashmiri chili powder is ideal for its vibrant red hue and mild heat. Stir the spices for 2–3 seconds on low heat.
Immediately follow with the ginger-garlic-tomato paste. Stir continuously on medium-high heat for 2 minutes, allowing the raw smell to cook off and the mixture to thicken.
Step 7: Prepping and Adding the Chicken
Now it’s time to add your main star: chicken. But wait! There's a crucial tip here.
Never add chicken directly after washing it. Always let the chicken drain in a colander to remove excess water. Otherwise, that water will boil instead of sear the meat, leaving you with a bland, watery mess.
Add the chicken pieces and stir on high heat. The goal is to evaporate any moisture released from the chicken and allow the meat to sear in the masala. This process enhances flavor significantly.
This step requires patience. Stir and cook until all liquid evaporates—this could take 10–15 minutes. Only then should you proceed.


Step 8: Layering the Flavor
Once the moisture has evaporated and the chicken is slightly browned, add:
- Salt to taste
- 1 tablespoon ground coriander (optional)
- 1/2 teaspoon garam masala powder
Stir everything well. The spices will start to bloom in the oil, deepening the complexity of the curry.
Now it’s time for the yogurt. Give it a final whisk and add it to the pan. Keep the heat low to prevent curdling. Stir continuously as you incorporate the yogurt. When you start seeing little bubbles, you can rest your hands.
Increase the heat slightly and stir occasionally to prevent sticking. As the yogurt cooks down, your gravy will thicken and turn rich.
Step 9: Optional Add-Ins – Customize Your Curry
At this point, you can get creative. For instance:
- Add peeled potato chunks if you like. Potatoes absorb the curry flavors and become beautifully tender.
- A pinch of sugar (yes, sugar!) balances acidity and spice in a subtle way.
- A pinch of ground mace and nutmeg adds a sweet, floral note in the background.
All of these are optional, but they elevate the dish when used sparingly.


Step 10: Simmer and Finish
Add about one cup of hot water—just enough to submerge the chicken halfway. Don’t overdo it. This is a curry, not a soup.
Cover the pot and simmer on very low heat for 25 minutes. Stir occasionally to ensure nothing sticks or burns at the bottom.
After 25 minutes, uncover the lid. You’ll notice the oil has risen to the surface—this is a great sign! The curry is nearly done.
Use a spoon to remove visible whole spices like cardamoms and cloves to avoid accidental bites at the table. If you do serve the curry with spices intact, be sure to let your guests know to push them aside.